- Category: Evinrude-Johnson Outboard Decals
- Hits: 1084
1997 EVINRUDE/JOHNSON 90/115
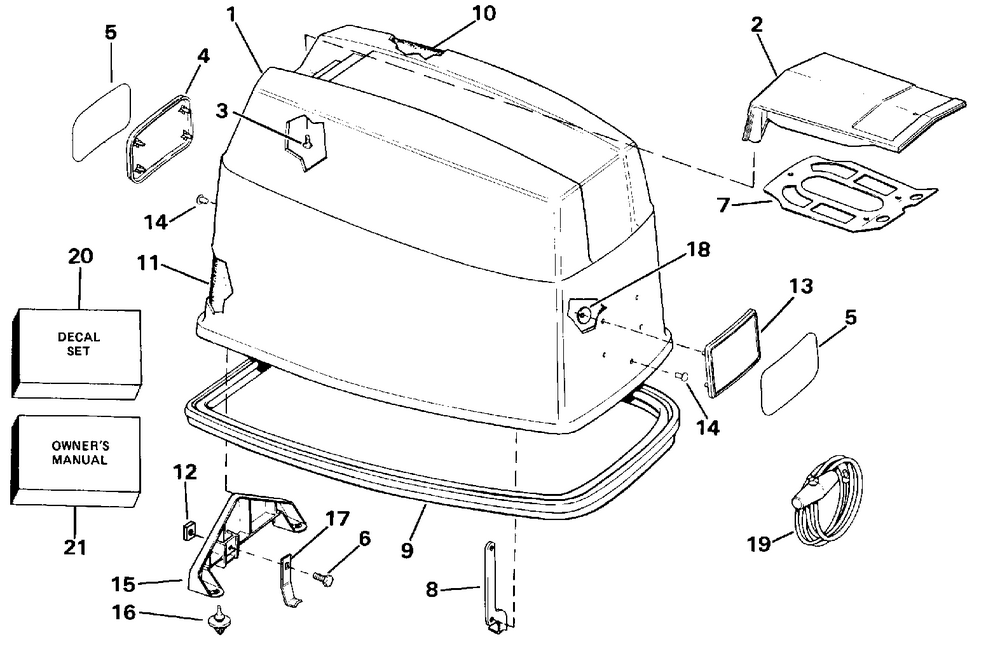
Evinrude/Johnson JOHNSON 1997 115 J115GLEUA 1997 ENGINE COVER - JOHNSON
0438347 ENGINE COVER ASSY. 90HP White
0438348 ENGINE COVER ASSY. 115HP White
0436873 ENGINE COVER ASSY. 90SL, SX
0436874 ENGINE COVER ASSY. 115SL, SX
0438350 ENGINE COVER ASSY. 115GL - FAST STRIKE
0438841 ENGINE COVER ASSY. L115GL Red - LUND
0437830 ENGINE COVER ASSY. L115GL Green - LUND
0438842 ENGINE COVER ASSY. L115GL Blue - LUND
0438843 ENGINE COVER ASSY. L115GL Beige - LUND
0438347, 0438348, 0436873, 0436874, 0438350, 0438841, 0437830, 0438842, 0438843
11 0212492 LENS, Front, V4 - 115HP Smoke 115GL
18 0343346 LENS, Johnson, port & stbd. - L115GL Beige 115HP Smoke 115GL
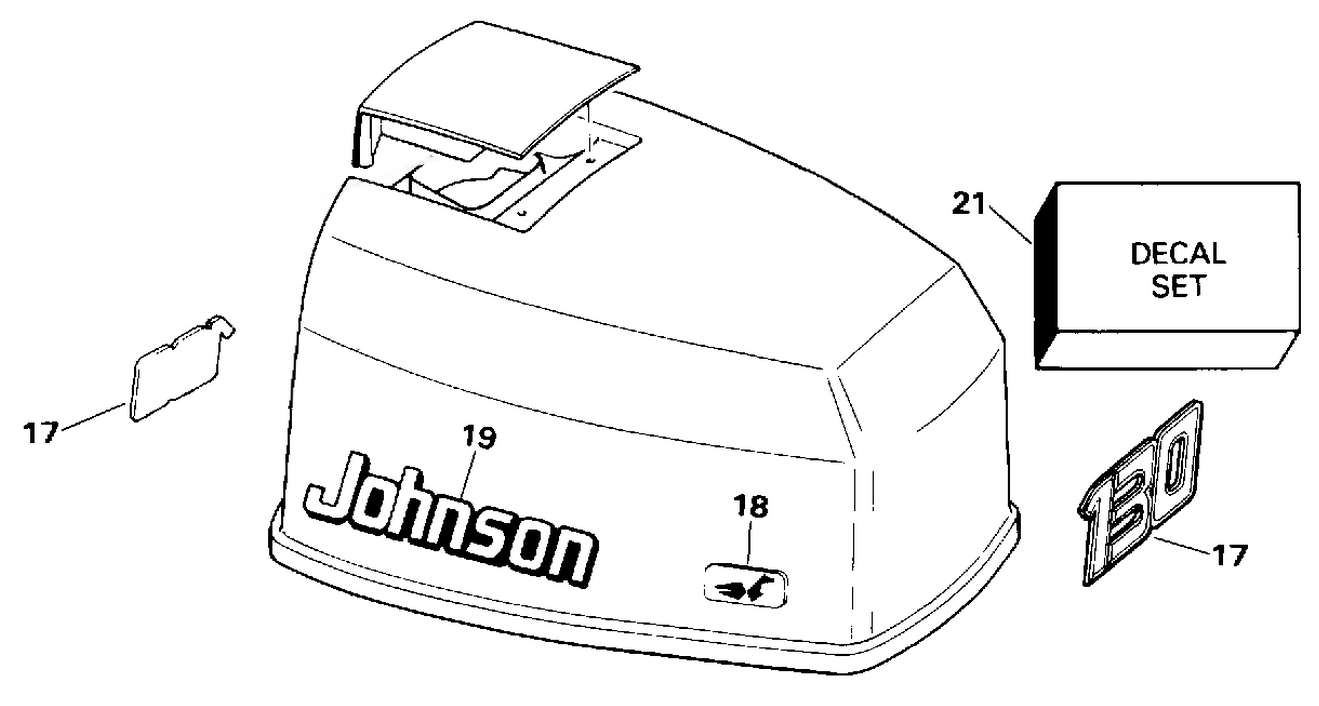
19 0212496 LENS, Rear, 115 - 115HP Smoke 115GL
23 0438461 DECAL SET - 90HP White - Red Decals
23 0438462 DECAL SET - 115HP White
23 0438463 DECAL SET - 115GL
23 0437165 DECAL SET - 90SL, SX
23 0437166 DECAL SET - 115SL, SX
LUND
23 0438851 DECAL SET - L115GL Red
23 0437841 DECAL SET - L115GL Green
23 0438852 DECAL SET - L115GL Blue
23 0438853 DECAL SET - L115GL Beige
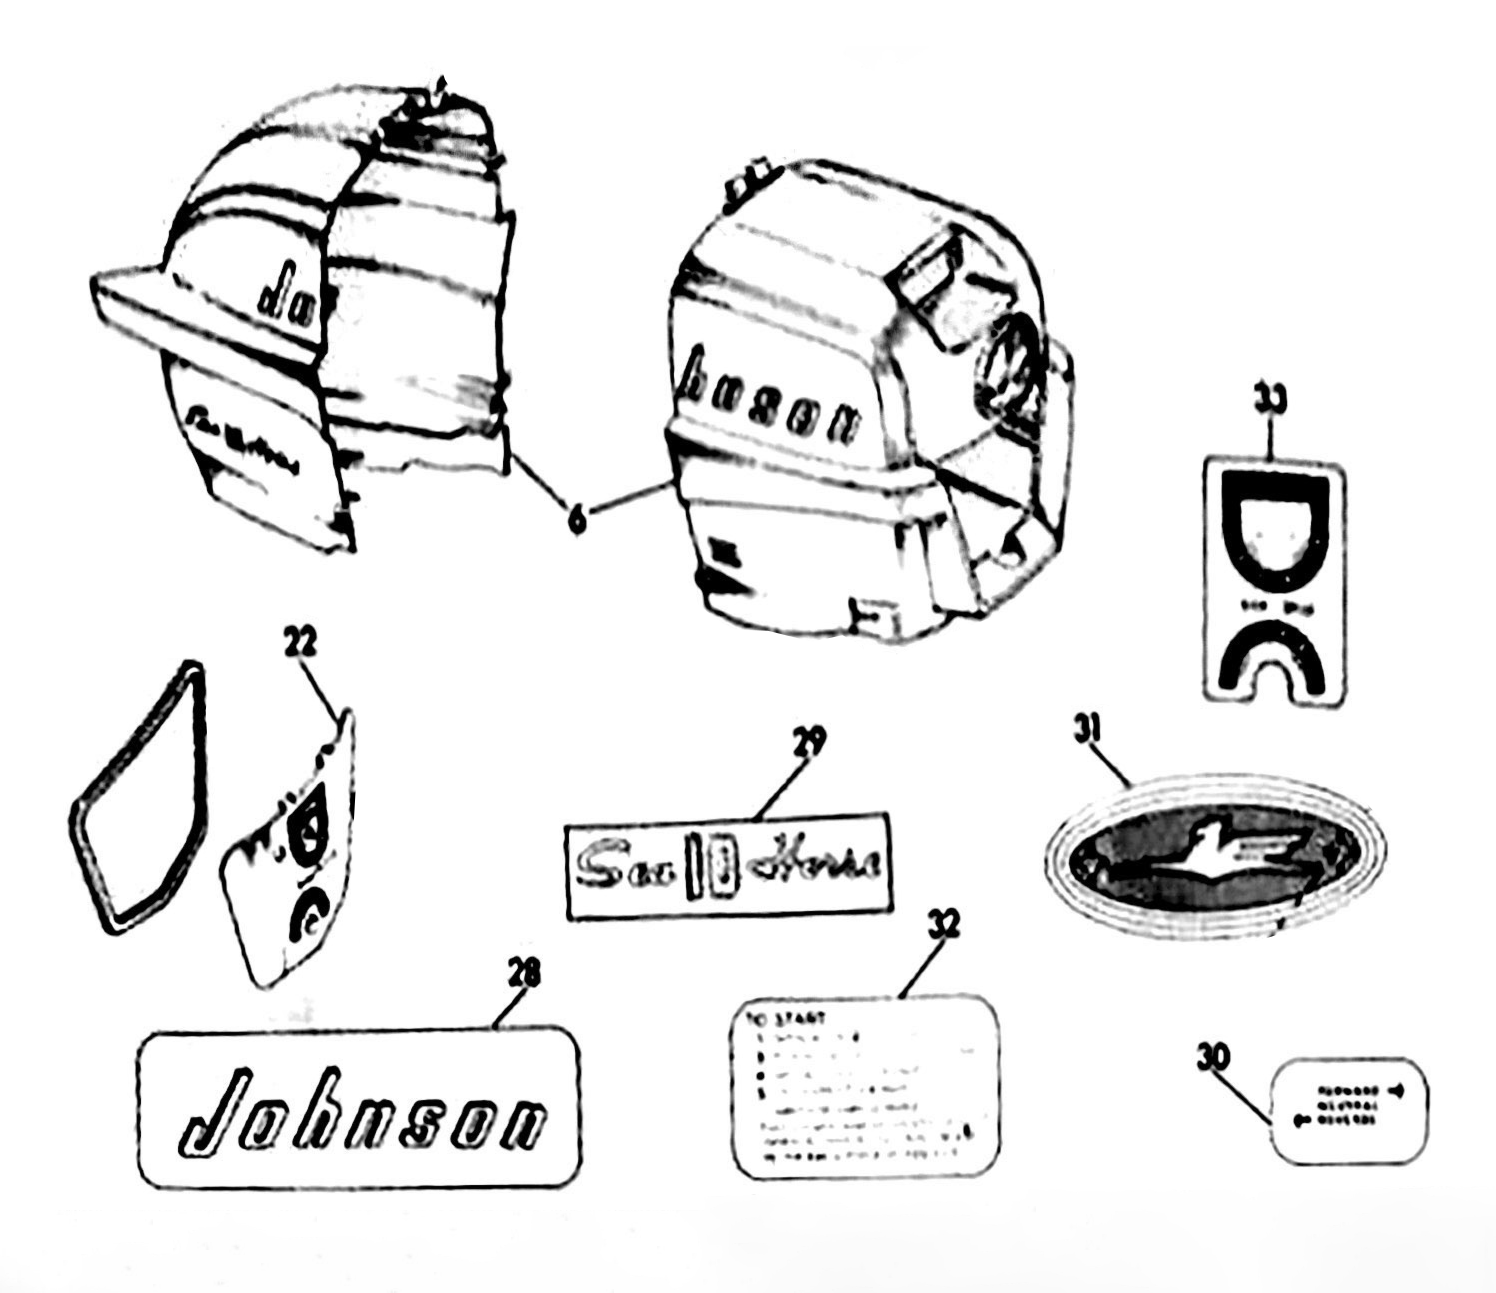
This Johnson 0284847 DECAL SET. 115GL fits the following models:
90HP
1995 J90SLEOC J90EXEOC J90ELEOC
1996 SJ90ELEDR J90SLEDR J90ELEDR BJ90SLEDR BJ90ELEDR
1997 J90SLEUA J90ELEUC J90ELEUA BJ90SXEUA BJ90SLEUA BJ90ELEUC BJ90ELEUA
115HP
1995 J115SXEOC J115SLEOC J115GLEOC J115ELEOC
1996 SJ115ELEDR J115SXEDR J115SLEDR J115GLEDR J115ELEDR HJ115SLEDR BJ115SXEDR BJ115GLEDR BJ115ELEDR
1997 J115SXEUC J115SXEUA J115SLEUC J115SLEUA J115GLEUC J115GLEUA J115ELEUC J115ELEUA HJ115SLEUC HJ115SLEUA BJ115SXEUC BJ115SXEUA BJ115GLEUC BJ115GLEUA BJ115ELEUC BJ115ELEUA
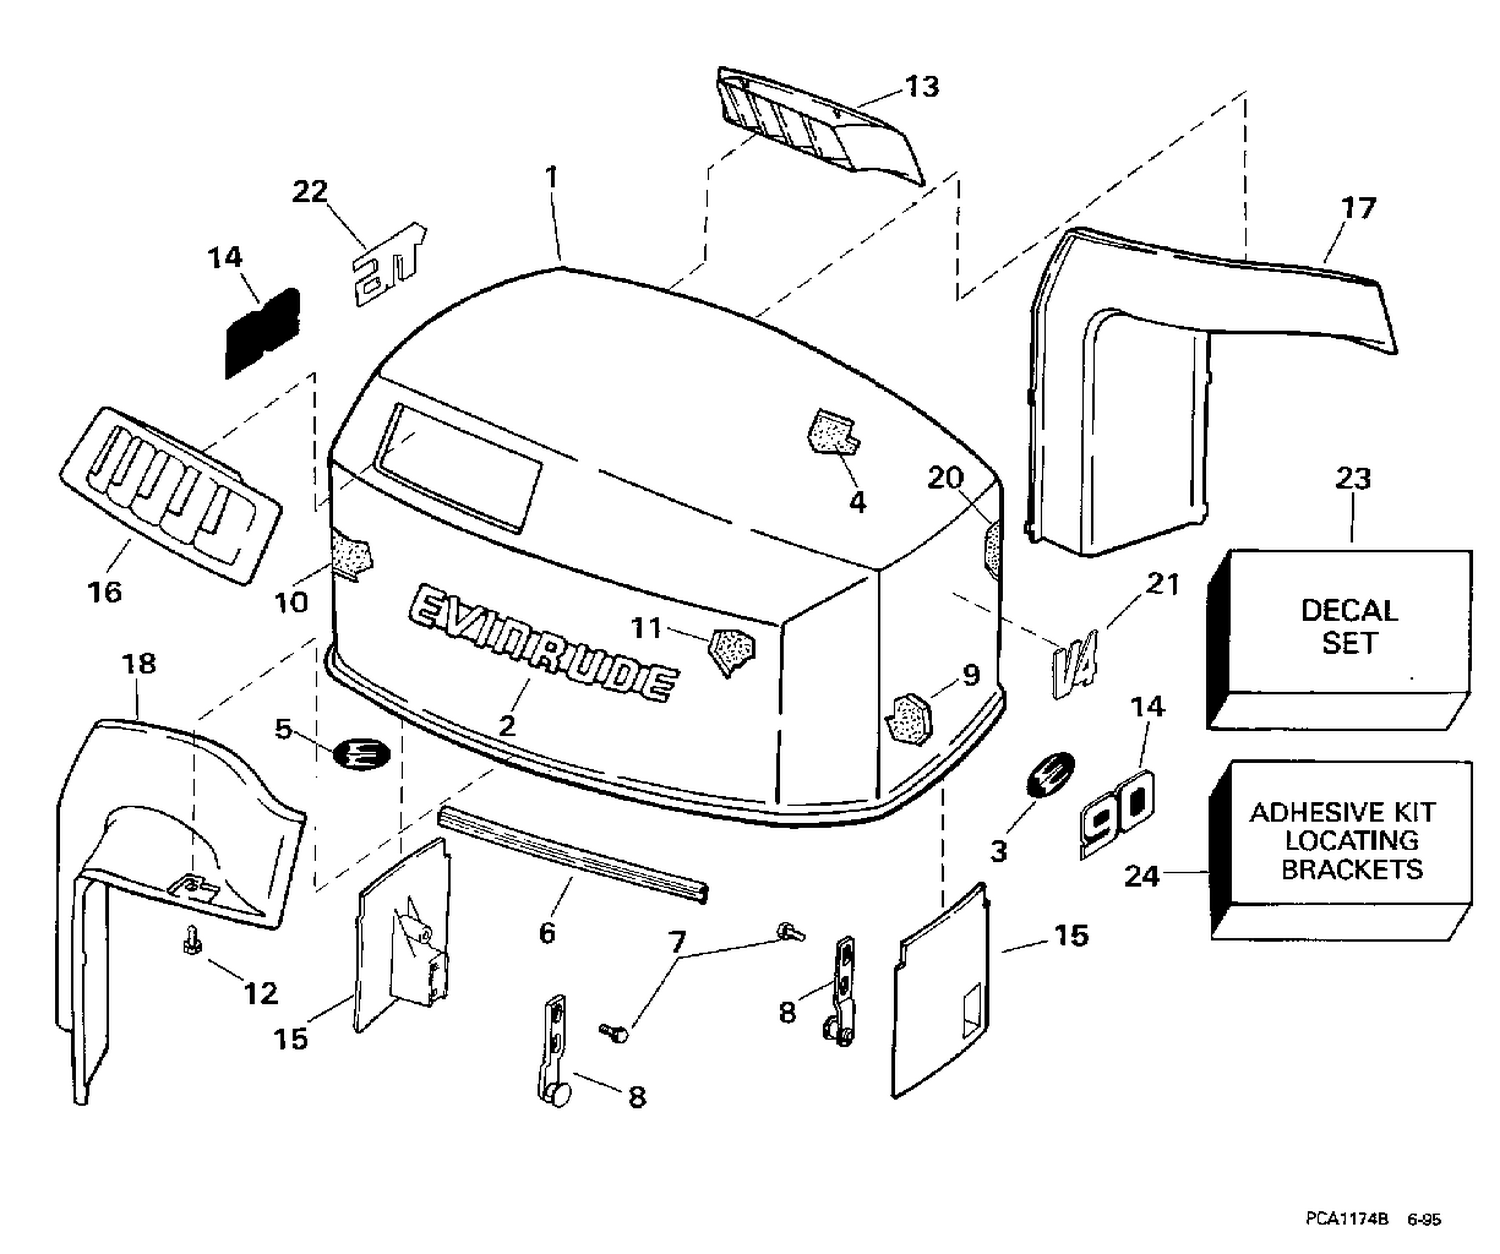
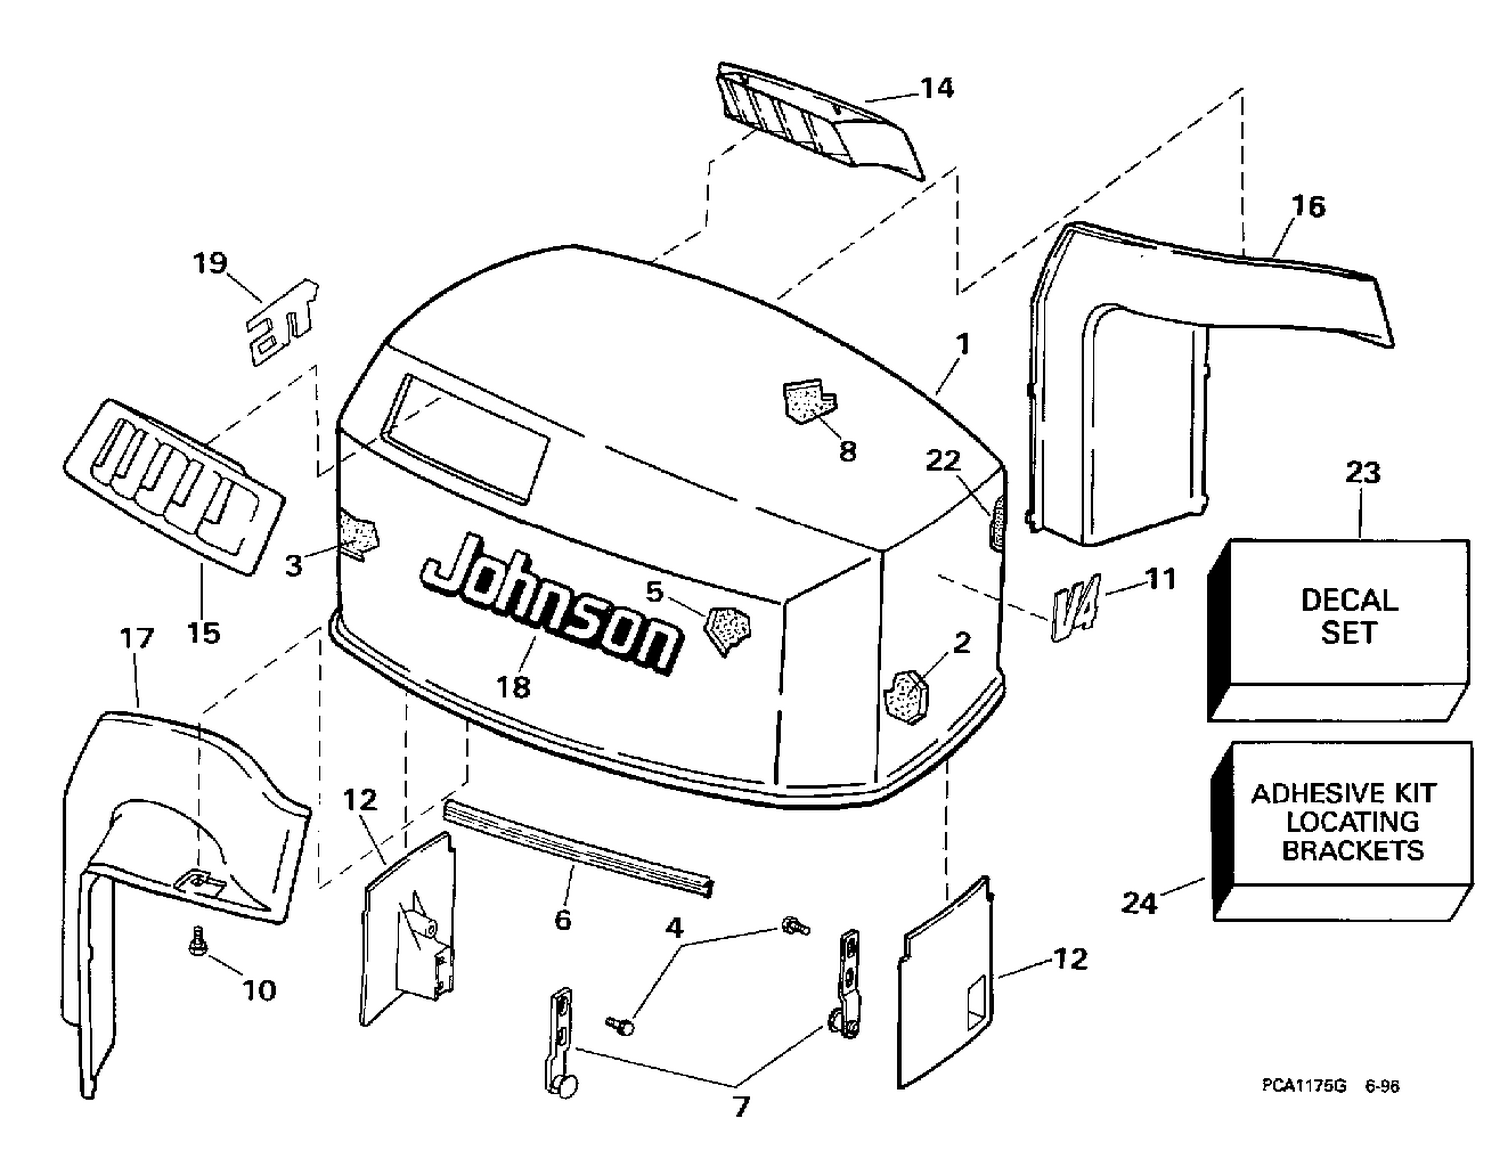
Evinrude Engine Cover
0284741 ENGINE COVER ASSY.. 90EL
0284743 ENGINE COVER ASSY.. 115EL
0284744 ENGINE COVER ASSY.. 115GL
0284853 ENGINE COVER ASSY.. L115GL Green
0284951 ENGINE COVER ASSY.. L115GL Red
0284952 ENGINE COVER ASSY.. L115GL Blue
0284953 ENGINE COVER ASSY.. L115GL Beige
0284645 ENGINE COVER ASSY.. 90SL, SX
0284646 ENGINE COVER ASSY.. 115SL, SX
0284741, 0284743, 0284744, 0284853, 0284951, 0284952, 0284953, 0284645, 0284646
2 0212495 LENS, Evinrude. 90EL 115EL 115GL
3 0212497 LENS, Ev. logo, front. 115GL
5 0212478 LENS, Ev. logo. 90EL 115GL
14 0212523 LENS, Front & rear, 115. 115EL
14 0212522 LENS, Front & rear, 90. 90EL
21 0212492 LENS, Front, V4. 115GL
22 0212496 LENS, Rear, 115. 115GL
23 0284681 DECAL SET. 90SL, SX
23 0284682 DECAL SET. 115SL, SX
23 0284846 DECAL SET. 115EL
23 0284847 DECAL SET. 115GL
23 0284861 DECAL SET. L115GL Green
23 0284862 DECAL SET. L115GL Blue
23 0284961 DECAL SET. L115GL Red
23 0284963 DECAL SET. L115GL Beige