- Category: Mercury-Mariner-Tracker-Force Outboard Decals
- Hits: 1168
1979 -1980 Chrysler 70 HP - 700 SKIER > ARCHIVE CAT FOB3083 FOB3301 FOB3466
> Mercury Marine [Updated: Jan. 13, 2023] > Outboard > Chrysler > 70 HP > ARCHIVE CAT FOB3083
70 H.P. SKIER - SERIAL NUMBER
70 (1979) . . . . . 709B9A
70 (1979) . . . . . 709B9AN
70 (1979) . . . . . 709H9A
70 (1979) . . . . . 709H9AN
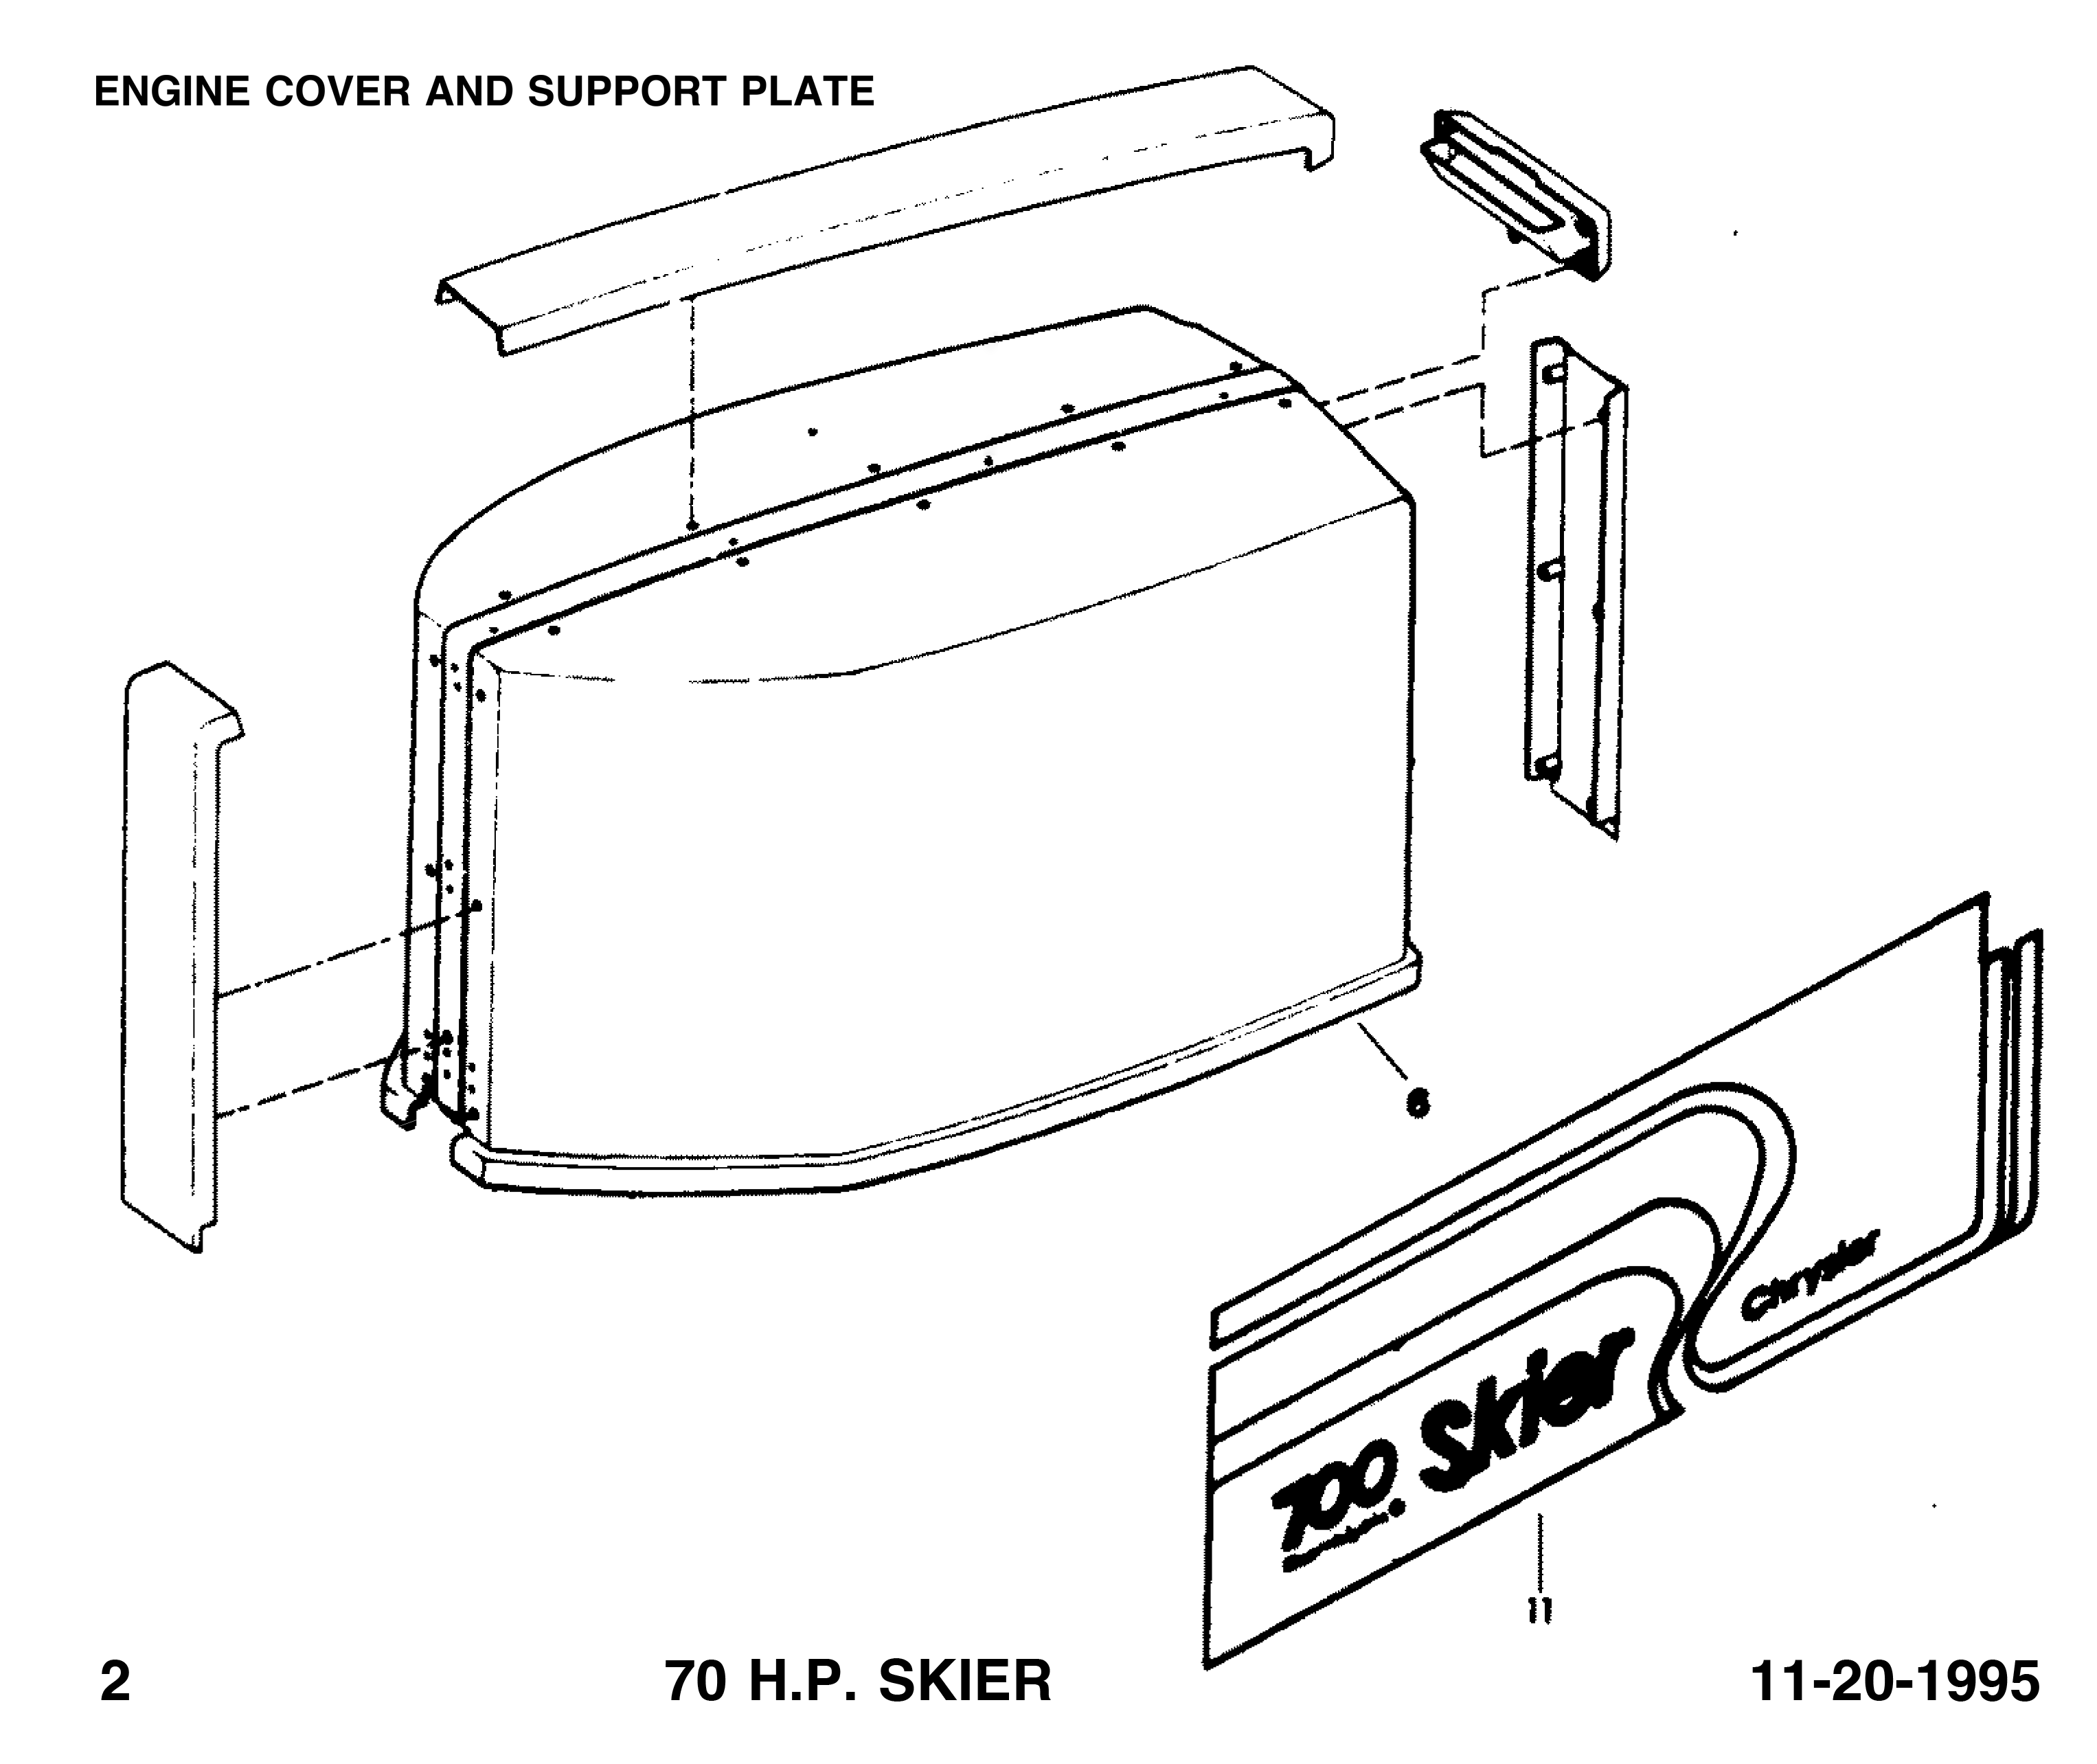
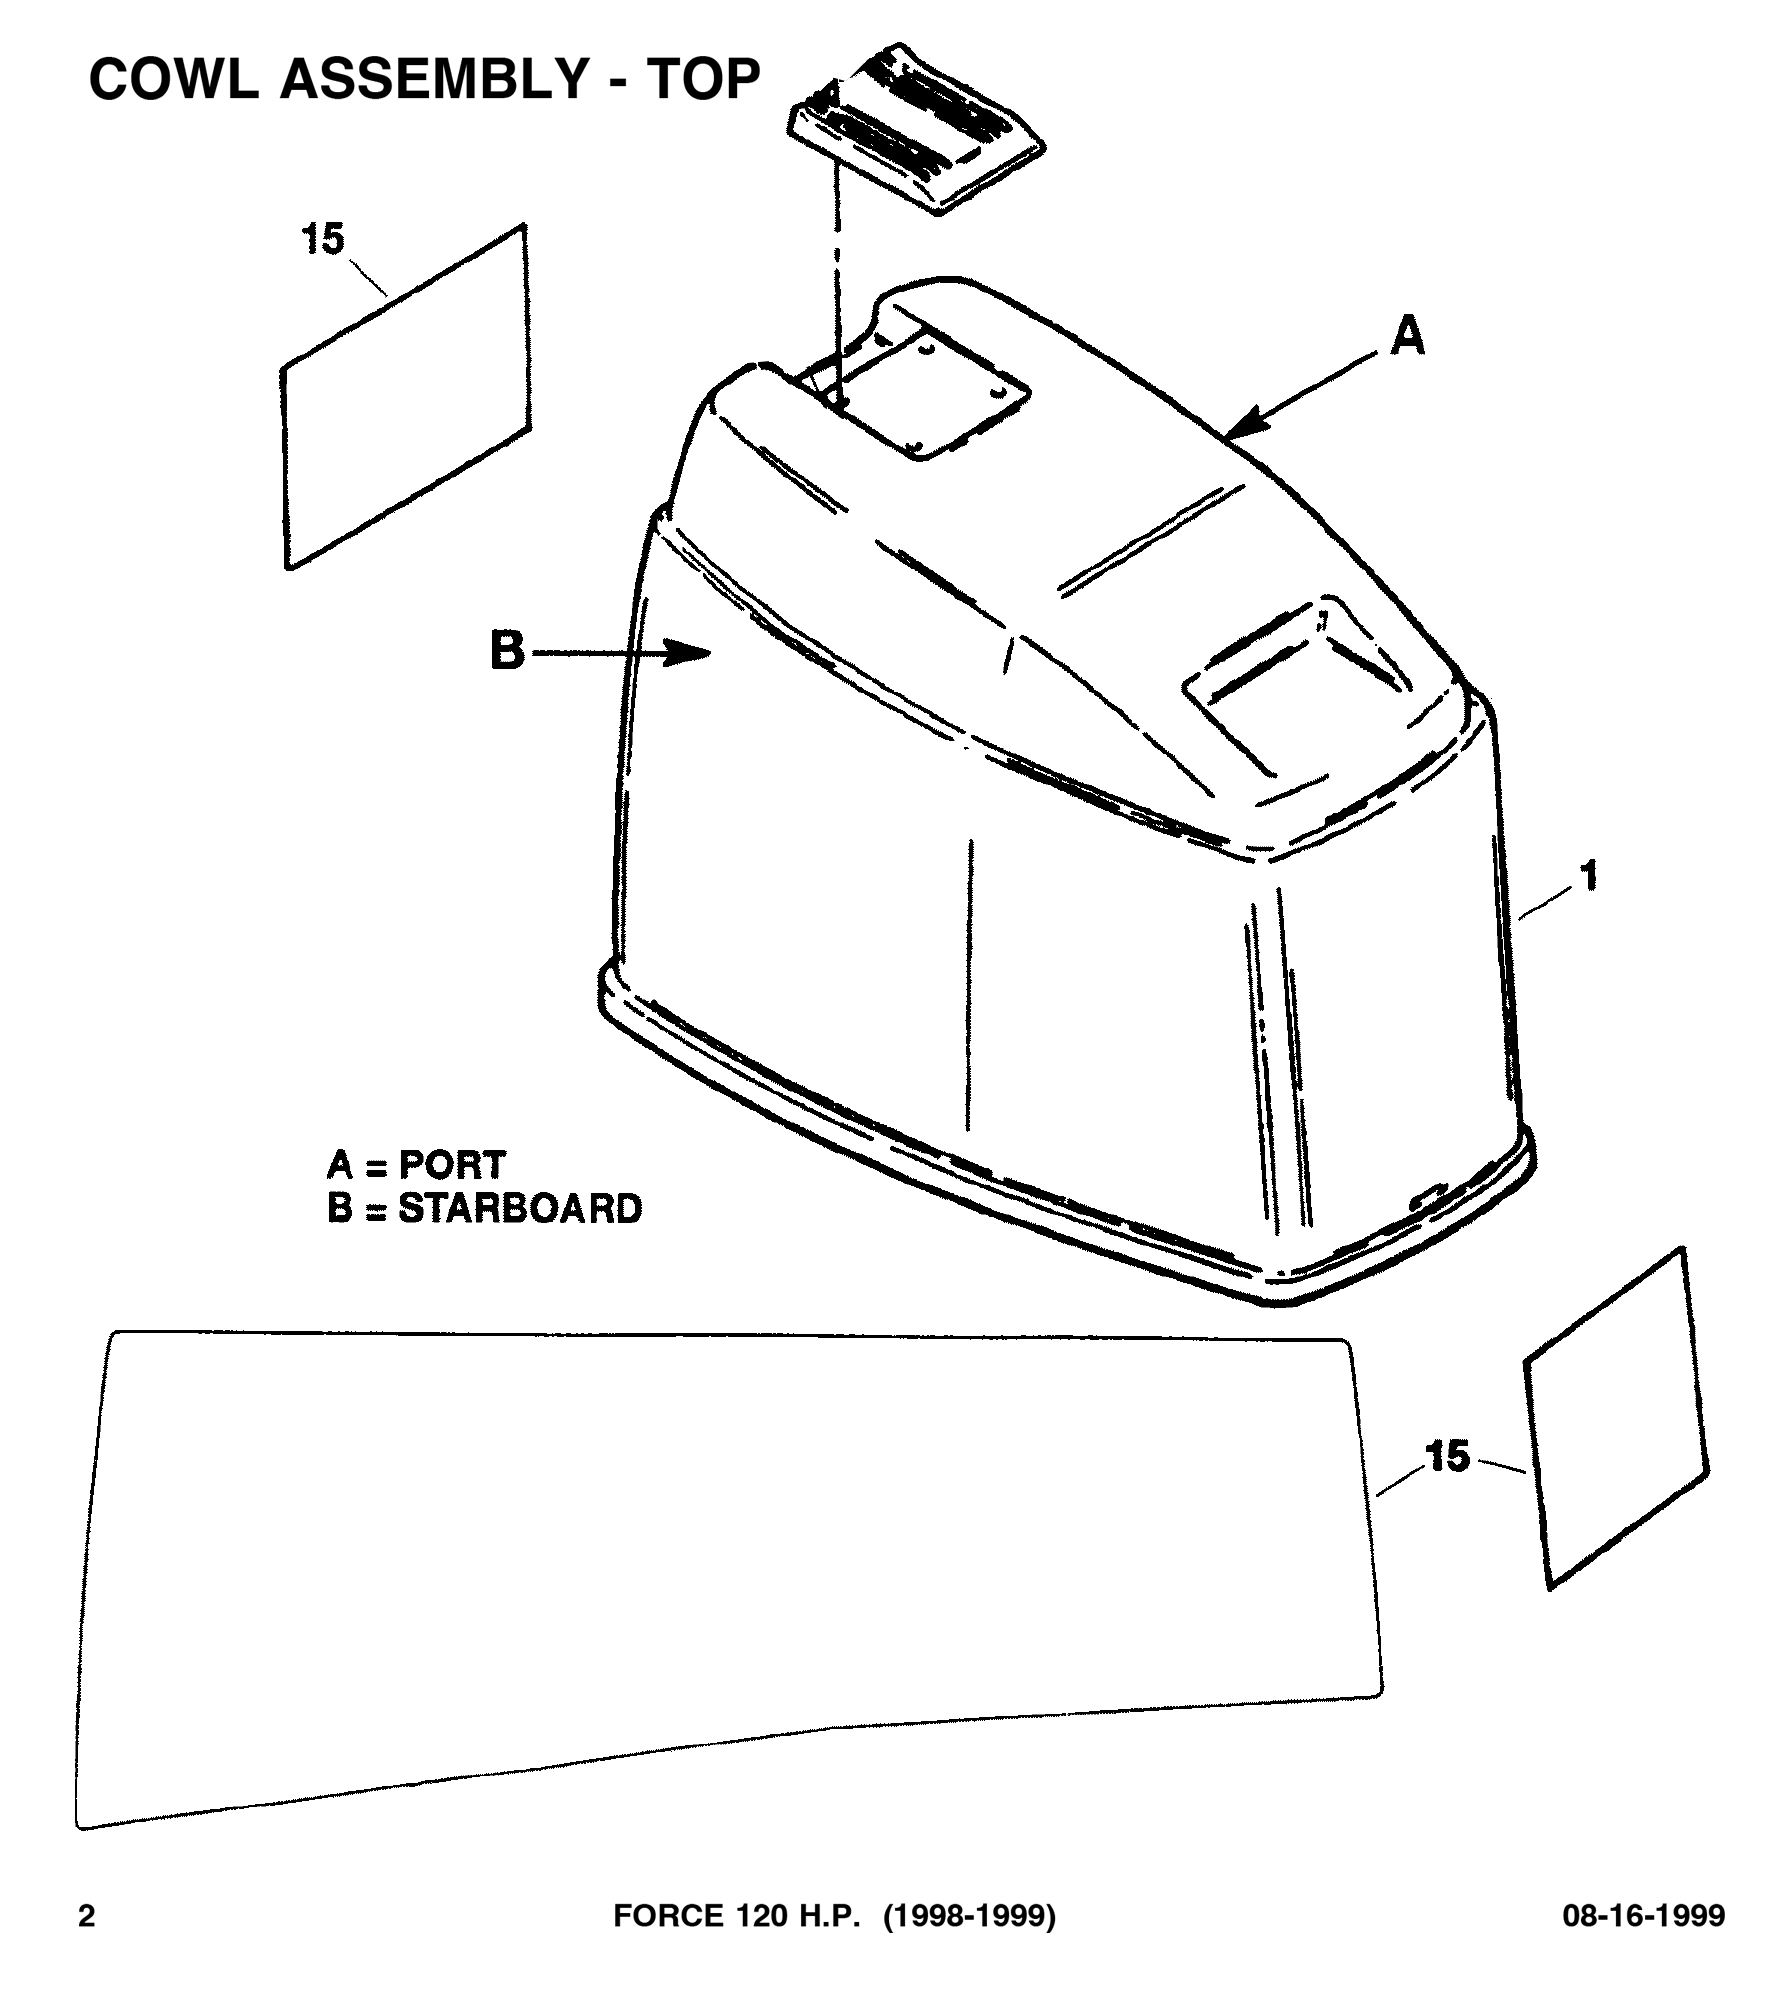
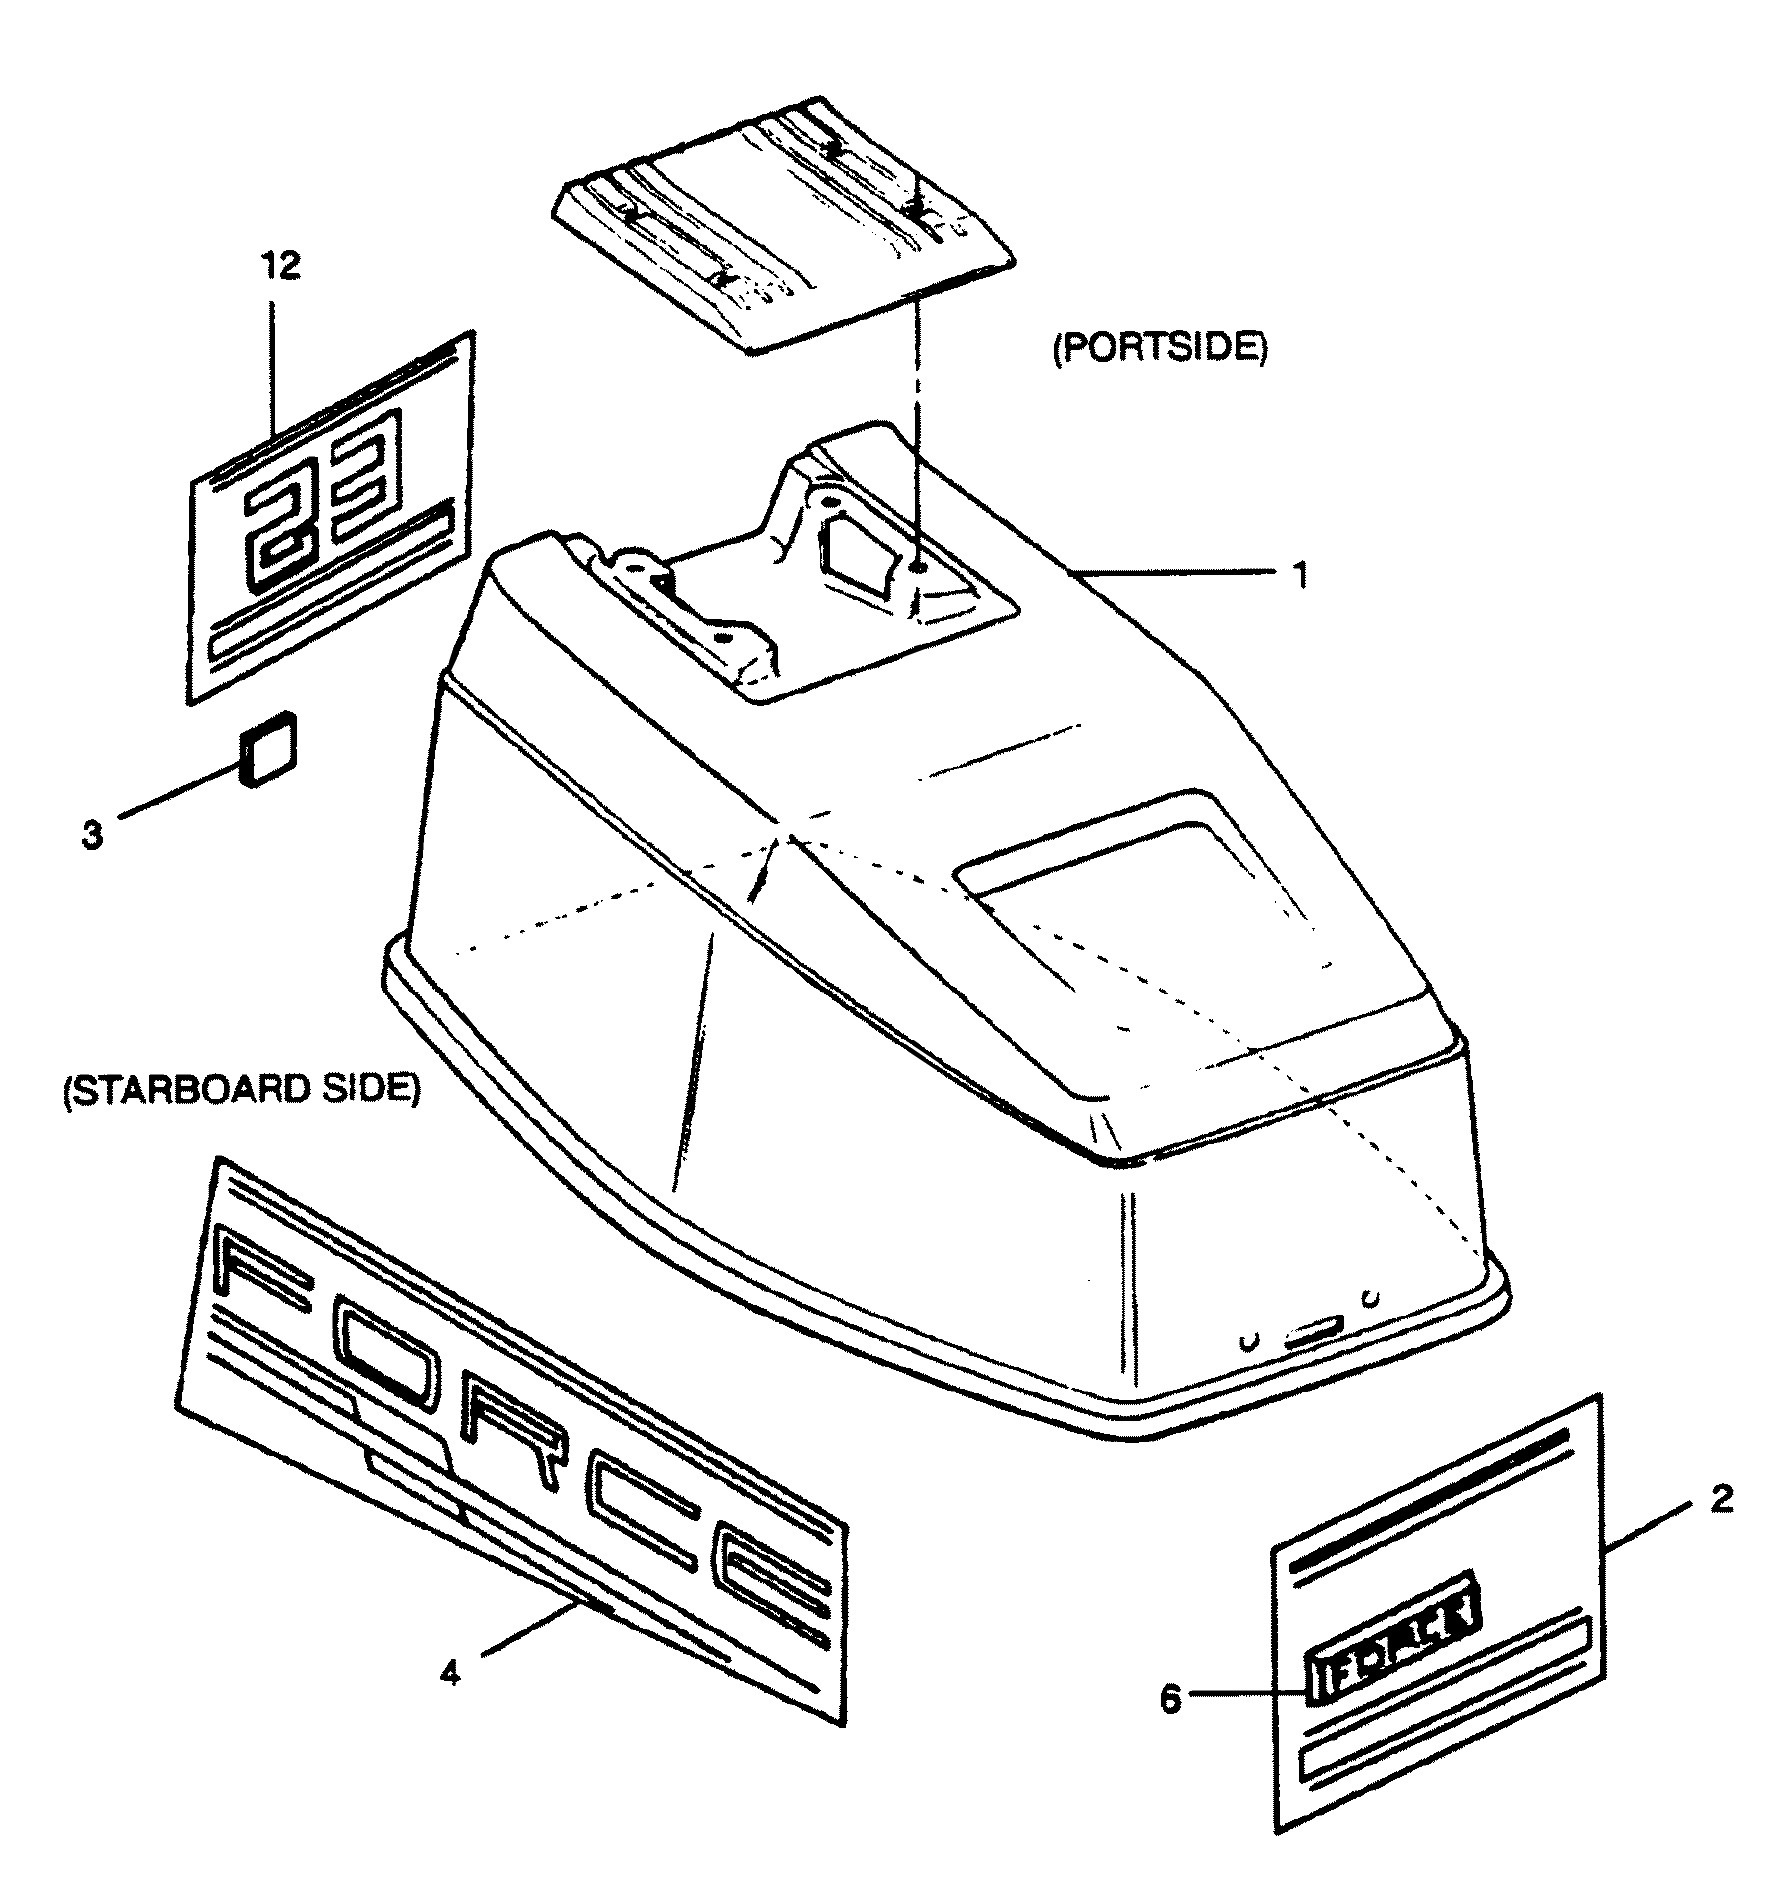
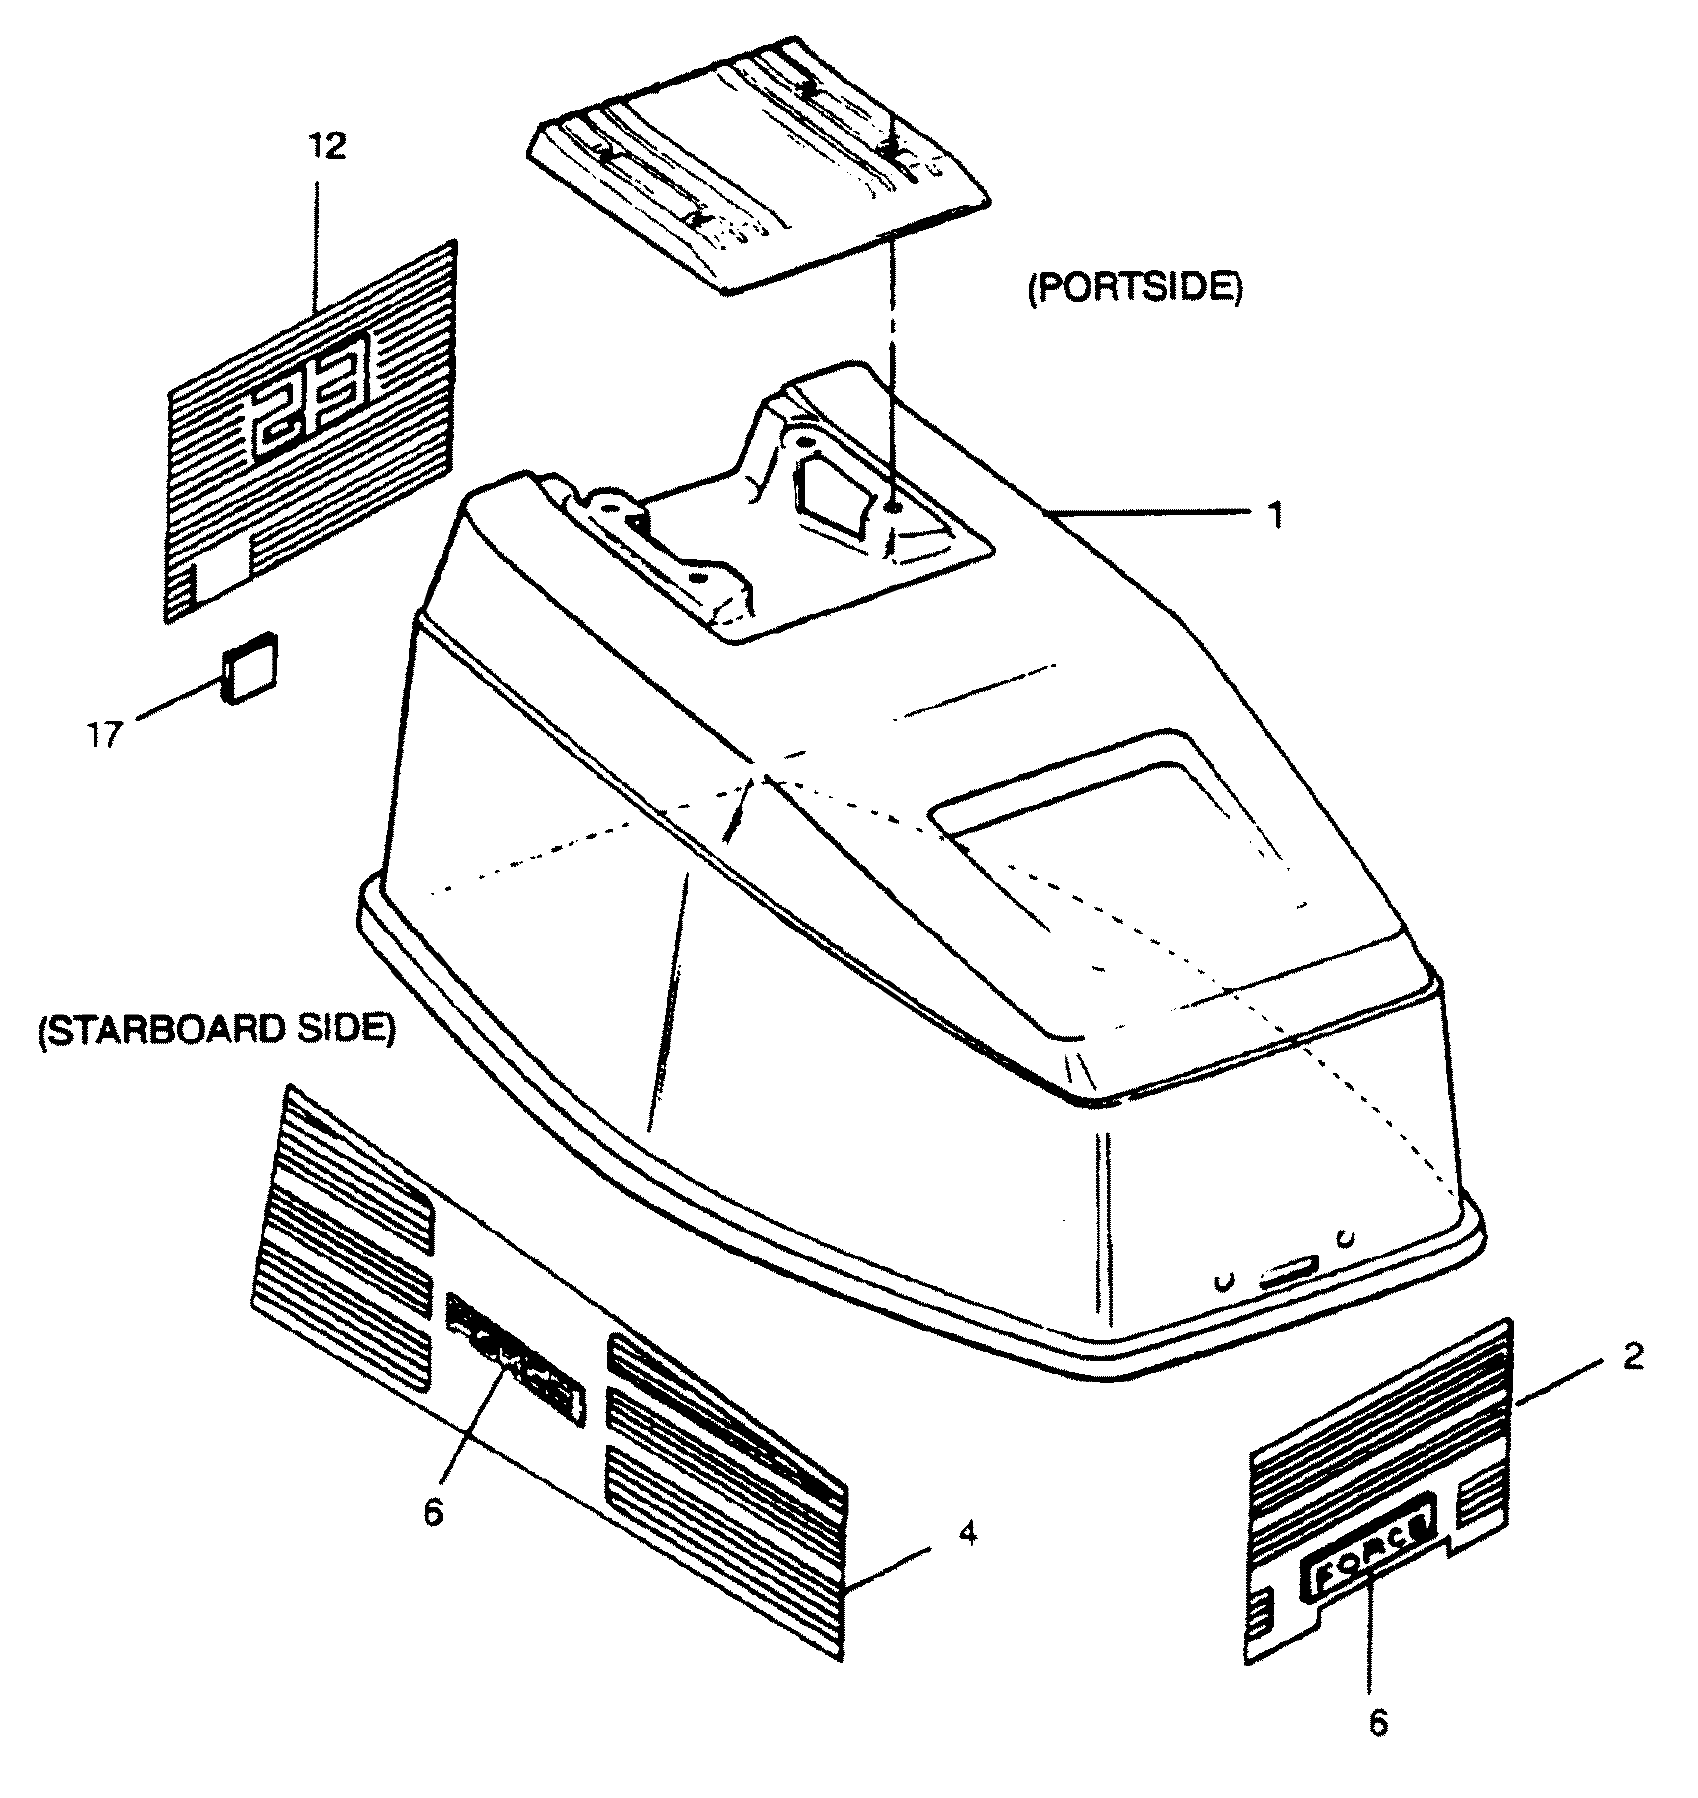
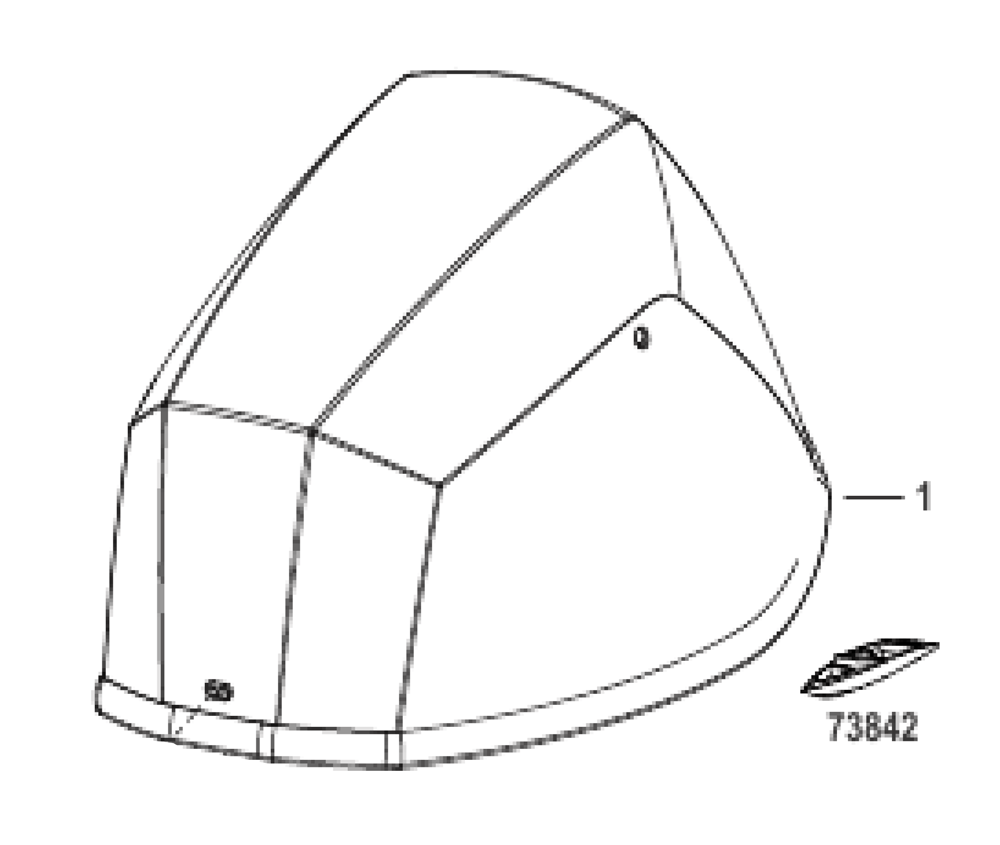
ENGINE COVER AND SUPPORT PLATE
6 FA549944 COVER, ENGINE W/RETAINER
6 3C548944 COVER, ENGINE - COMPLETE INCLUDES ITEMS MARKED WITH AN ASTERISK (*).
FA549944, 3C548944
FA549944 3C548944
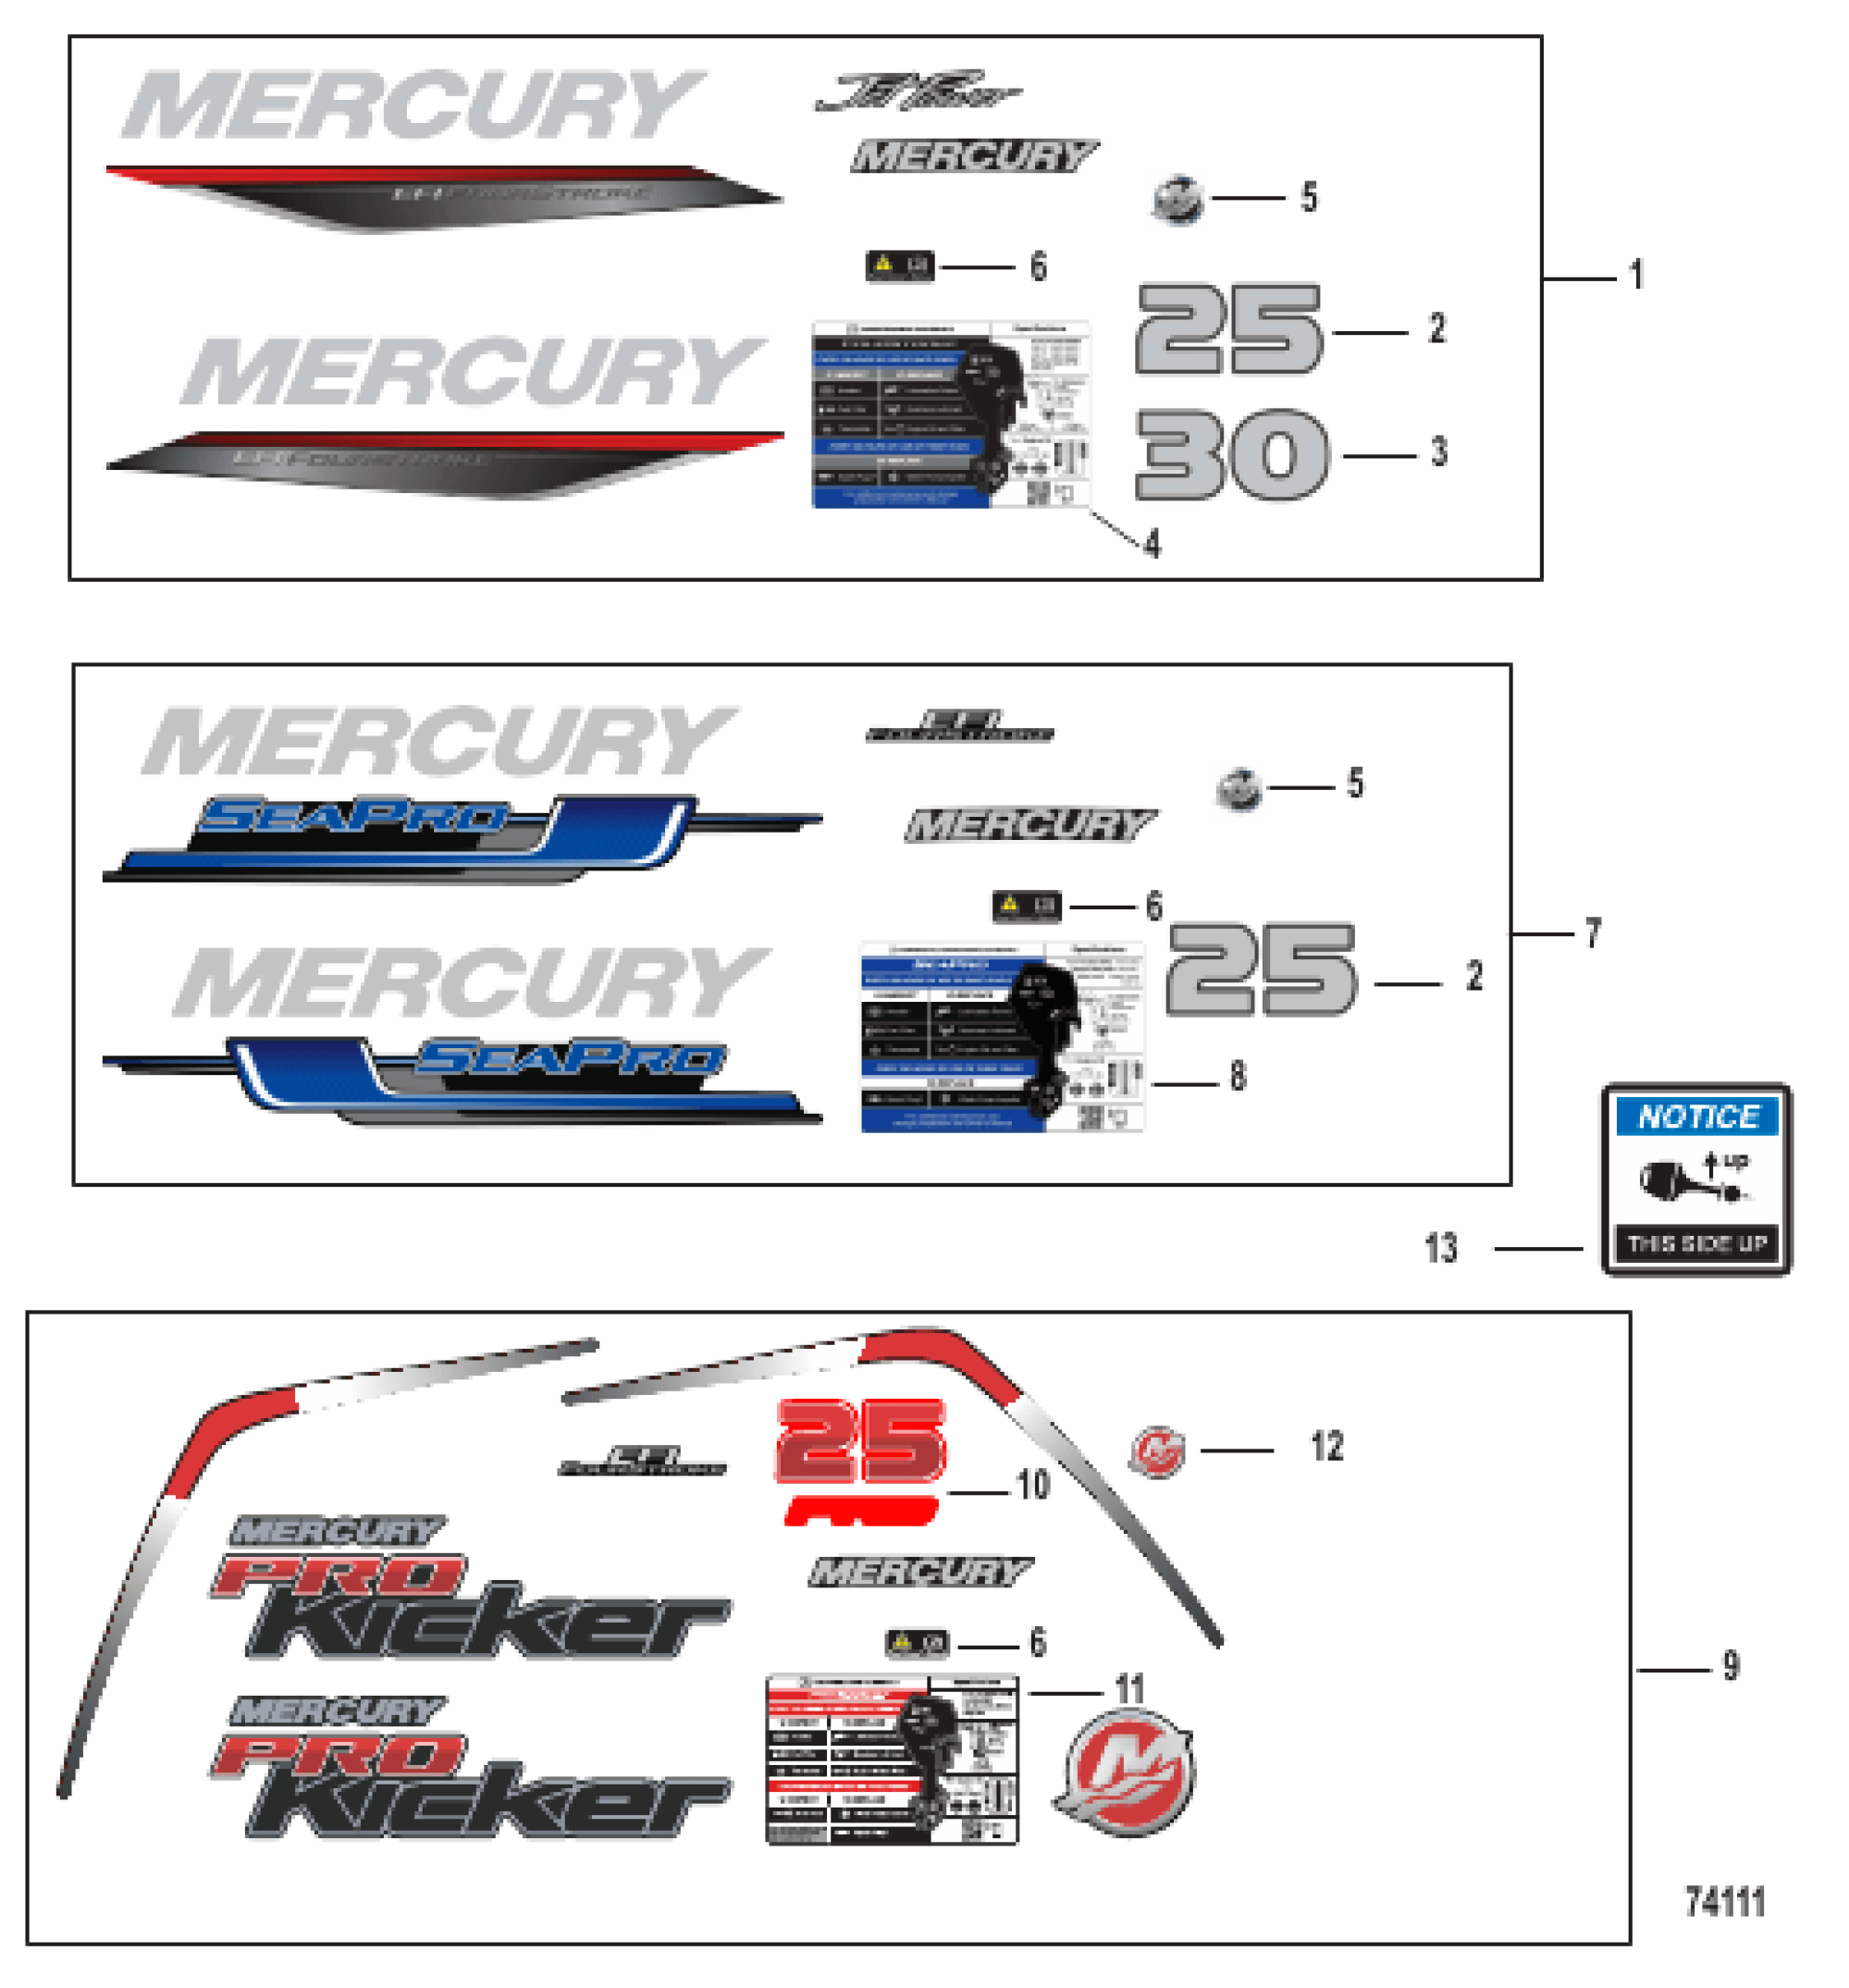
CHRYSLER DECALS
11 FA548397 DECAL, ENGINE COVER - PORT
11 FA548396 DECAL, ENGINE COVER - STARBOARD
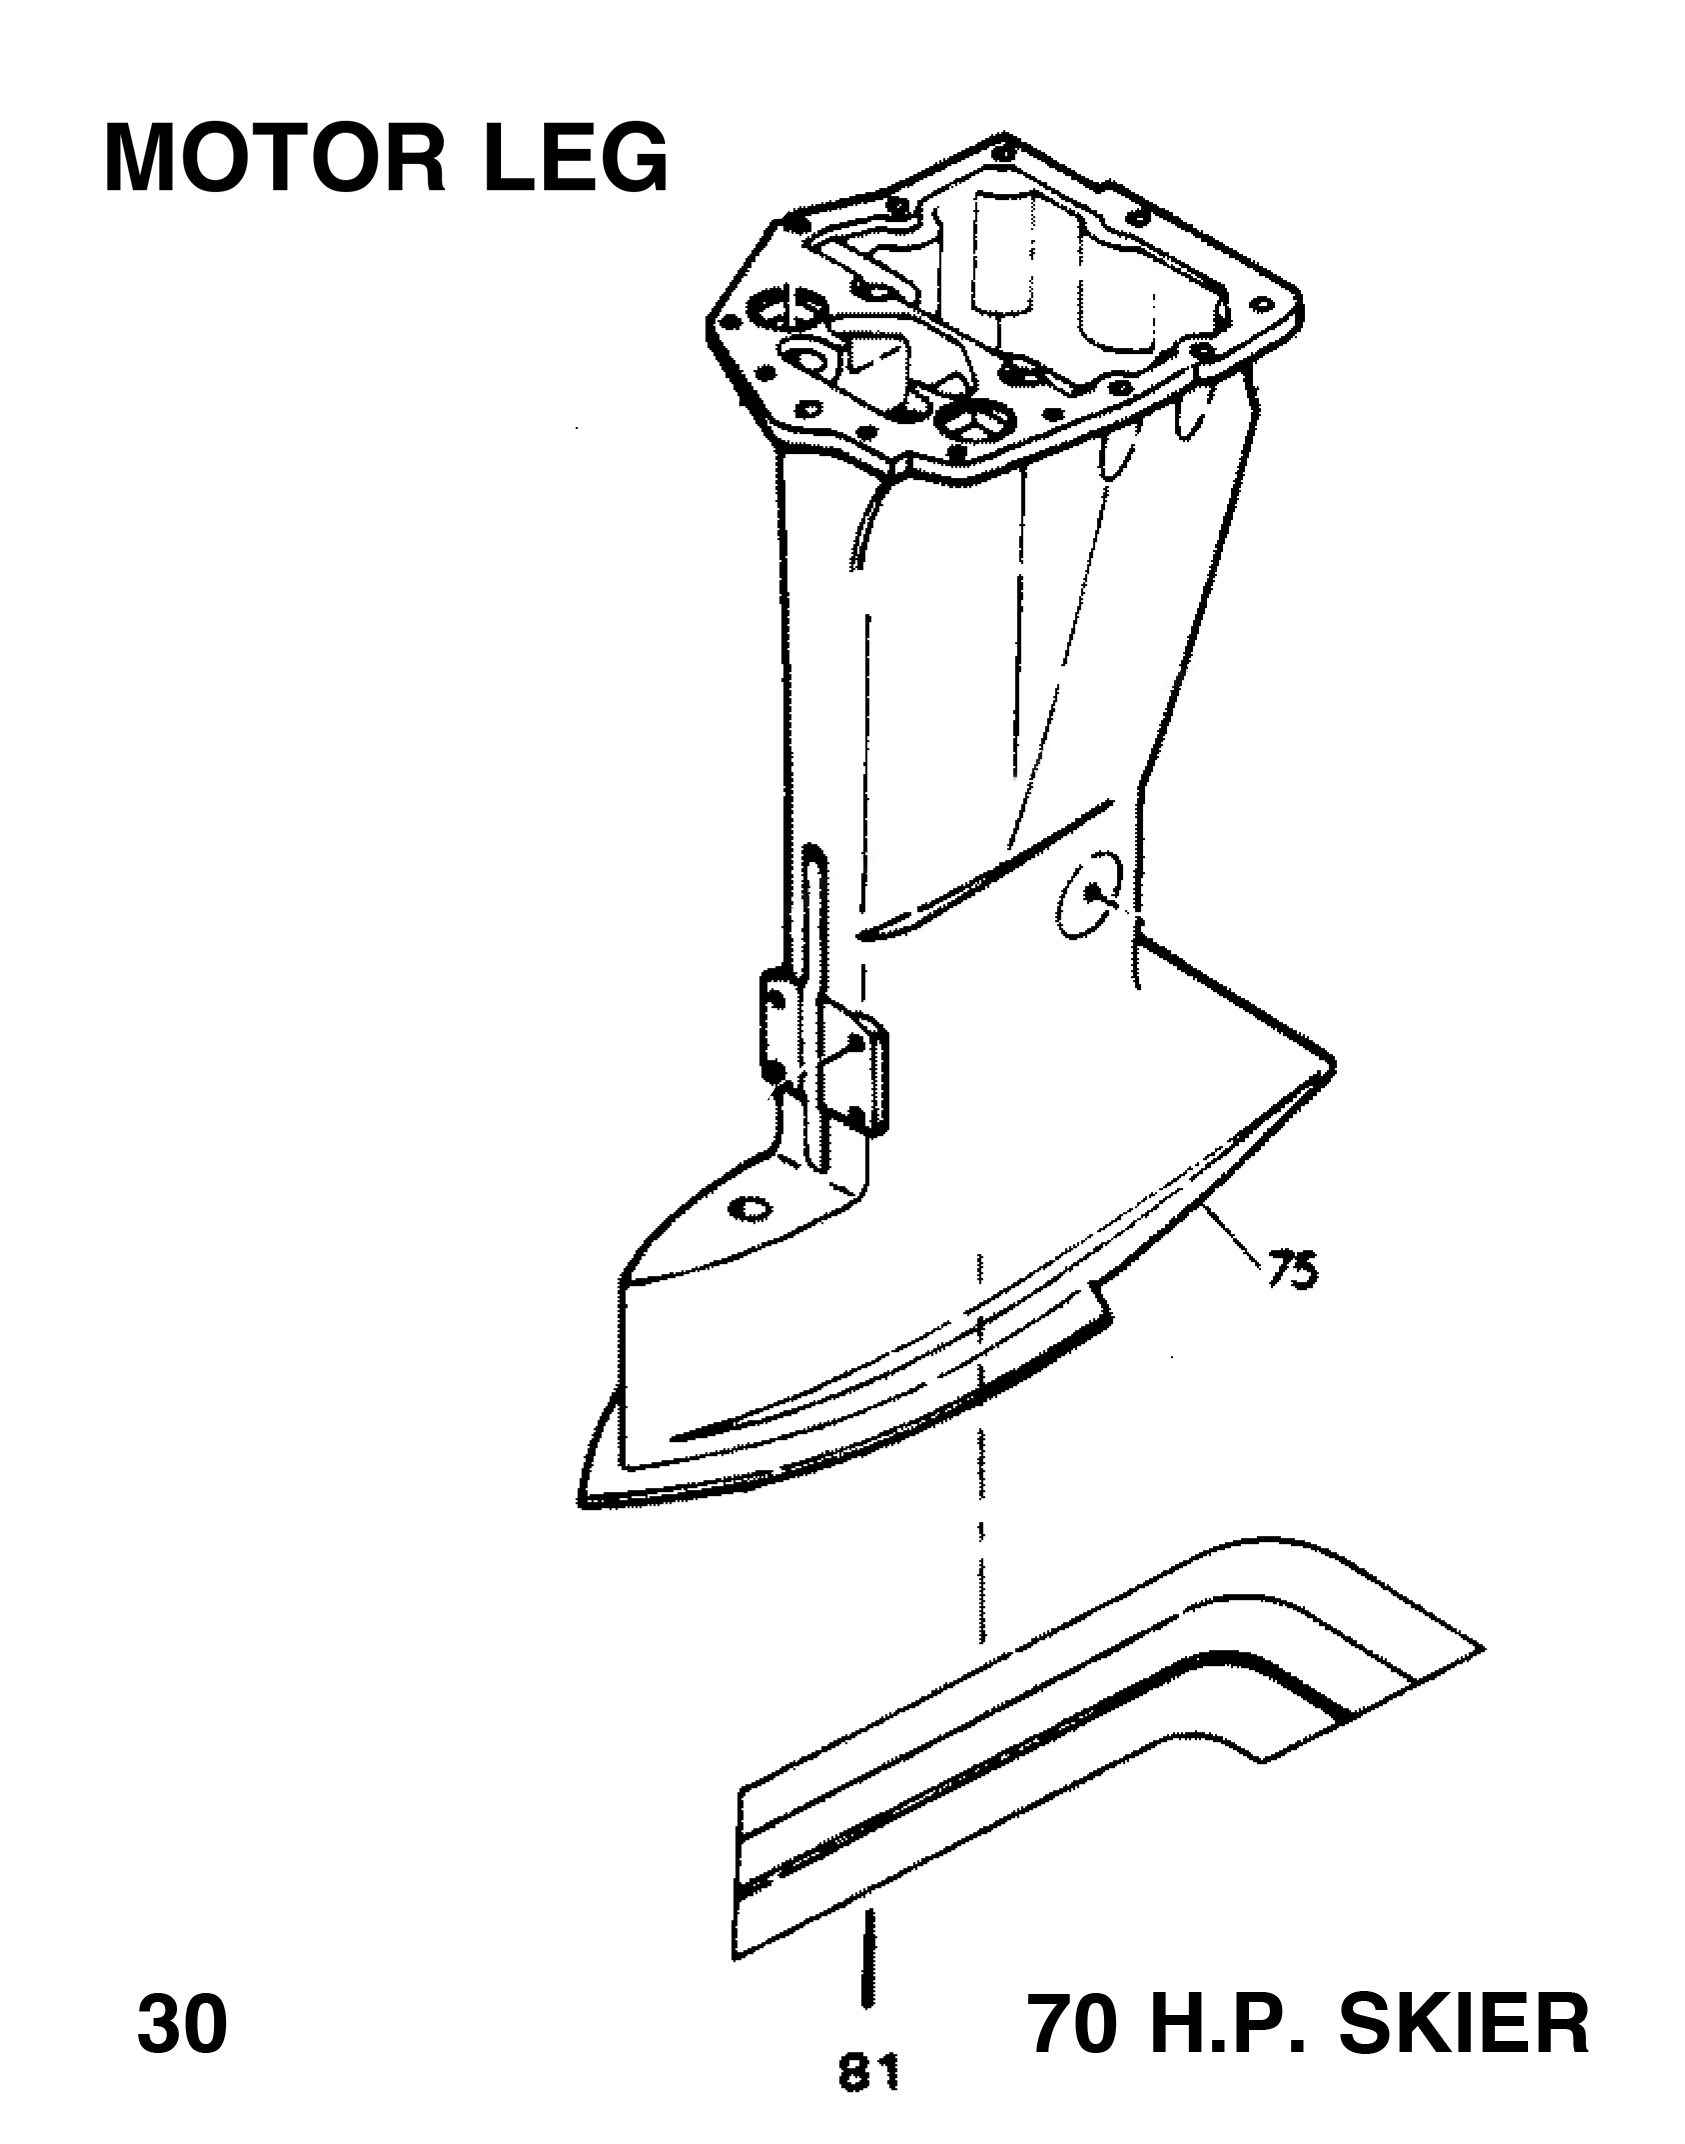
MOTOR LEG DECALS
80 F474390-1 DECAL, REVERSE LOCK - USA
80 37-819450 DECAL, REVERSE LOCK - CANADA
81 A548392 DECAL, LEG - PORT
81 A548391 DECAL, LEG - STARBOARD
FA548397, FA548396, F474390, 819450, A548392, A548391
FA548397 FA548396 F474390, 819450 A548392 A548391
ELECTRICAL COMPONENTS
41 F510374 DECAL, CIRCUIT BREAKER - USA
- FC510374 DECAL, CIRCUIT BREAKER - CANADA
45 FA523301 UNIT W/DECAL
49 F235785 DECAL, COMPLIANCE - CANADA (NOT SHOWN)
55 480373 DECAL, MAGNAPOWER IGNITION
56 F474387 TIMING DECAL - USA
- FC474387 TIMING DECAL - CANADA
DISTRIBUTOR
- 481373-1 DECAL, "ELECTRONIC" (NOT SHOWN)
POWERHEAD
75 F438398 DECAL, WIRING - USA
- FC438398 DECAL WIRING - CANADA
FUEL TANK AND LINE
- FC409398 DECAL, TOTE TANK - CANADA (NOT SHOWN)
REMOTE CONTROL
27 F17148 DECAL, STARBOARD
- F531892 DECAL, PORT
ACCESSORIES
- F5H131 PORT SIDE DECAL KIT CONVERTS 5H130 CONTROL BOX TO PORT SIDE MOUNTING
> Mercury Marine [Updated: Jan. 13, 2023] > Outboard > Chrysler > 70 HP > ARCHIVE CAT FOB3301
70 H.P. - SERIAL NUMBER
70 (1979) . T700B9A
70 (1979) . T700B9AN
70 (1979) . T700H9A
70 (1979) . T700H9AN
ENGINE COVER AND SUPPORT PLATE
6 FA549944 COVER, ENGINE W/RETAINER
- 3C548944 COVER, ENGINE - COMPLETE INCLUDES ITEMS MARKED WITH AN ASTERISK (*)
FA549944, 3C548944
FA549944 3C548944
CHRYSLER DECALS
11 FA548397 DECAL, ENGINE COVER - PORT
11 FA548396 DECAL, ENGINE COVER - STARBOARD
MOTOR LEG DECALS
81 A548392 DECAL, LEG - PORT
81 A548391 DECAL, LEG - STARBOARD
ENGINE COVER AND SUPPORT PLATE
41 F235785 DECAL, COMPLIANCE (CANADA)
ELECTRICAL COMPONENTS
41 F510374 DECAL, CIRCUIT BREAKER - U.S.A.
- FC510374 DECAL, CIRCUIT BREAKER - CANADA
45 300-817855A1 UNIT W/DECAL (ORIGINAL FORCE P/N A 523301-1)(Does not include Coil & Clamp)
55 480373 DECAL, MAGNAPOWER IGNITION
56 F474387 TIMING DECAL, U.S.A.
- FC474387 TIMING DECAL, CANADA
DISTRIBUTOR
- 481373-1 DECAL, "ELECTRONIC" (NOT SHOWN)
POWERHEAD
75 F438398 DECAL, WIRING - U.S.A.
- FC438398 DECAL, WIRING - CANADA
FUEL TANK AND LINE
- FC409398 DECAL, TOTE TANK CANADA (NOT SHOWN)
REMOTE CONTROL
27 F17148 DECAL, STARBOARD
- F531892 DECAL, PORT
ACCESSORIES
- F5H131 PORT SIDE DECAL KIT CONVERTS 5H130 CONTROL BOX TO PORT SIDE MOUNTING.
> Mercury Marine [Updated: Jan. 13, 2023] > Outboard > Chrysler > 70 HP > ARCHIVE CAT FOB3466
70 HP SKIER - SERIAL NUMBER
70 (1980) . . . 700H0AN
ENGINE COVER AND SUPPORT PLATE DIAGRAM 6 FA549944
1 COVER, ENGINE W/RETAINER - 3C548944
1 COVER, ENGINE - COMPLETE INCLUDES ITEMS MARKED WITH AN ASTERISK (*)
7 11 FA548397 DECAL, ENGINE COVER - PORT W/LITERATURE - FA548396
1 DECAL, ENGINE COVER - STARBOARD W/LITERATURE
MOTOR LEG DIAGRAM P30 28 70 HP SKIER 11-20-1995 80 F474390-1
80 F474390-1 DECAL, REVERSE LOCK - USA
- 37-819450 DECAL, REVERSE LOCK - CANADA
81 A548392 DECAL, LEG - PORT W/LITERATURE
- A548391 DECAL, LEG - STARBOARD W/LITERATURE
ELECTRICAL COMPONENTS
41 F510374 DECAL, CIRCUIT BREAKER - USA
- FC510374 DECAL, CIRCUIT BREAKER - CANADA
- F235785 DECAL, COMPLIANCE - CANADA (NOT SHOWN)
55 480373 DECAL, MAGNAPOWER IGNITION
56 F474387 TIMING DECAL - USA
- FC474387 TIMING DECAL - CANADA
DISTRIBUTOR
- 481373-1 DECAL, "ELECTRONIC" (NOT SHOWN)
POWER HEAD
75 F438398 DECAL, WIRING - USA
- FC438398 DECAL WIRING - CANADA
FUEL TANK AND LINE
- FC409398 DECAL, TOTE TANK - CANADA (NOT SHOWN)
REMOTE CONTROL
27 F17148 DECAL, STARBOARD
- F531892 DECAL, PORT
ACCESSORIES
- F5H131 PORT SIDE DECAL KIT CONVERTS 5H130 CONTROL BOX TO PORT SIDE MOUNTING